BMW 1999-2000 3-Series Rear Window Regulator Replacement Instructions
Well it finally happened. One of my window regulators broke. It was my left rear that went. I was rolling up the window when I heard a loud crack. It almost sounded like my window was hit by a rock snapped in half.
Anyway I knew it would happen eventually and I wasn't too upset over it. I just went online and found a replacement and ordered it.
The following is my DIY on how to replace it. I hope you find it useful.
Step 1. Get a replacement regulator. My car is a 1999
323i sedan so ordered P/N 51-35-8-212-099.
The following list has not been checked out so don't assume it's 100% correct.
1999-2005 E46 Sedan and Wagons
including all wheel drive models.
Front Left 51337020659
Front Right 51337020660
Rear Left 51358212099
Rear Right 51358212100
Bavarian Autosport has them for $94.95
each regardless of the part number.
KOPerformance.com has them for $120.05
each for the fronts and $114.08 each for the rears.
Auto Parts Deal has some aftermarket
ones for cheap. Fronts
for $47 each and rears
for $38 each.
ECS Tuning has genuine BMW fronts
for $117.97 each and rears
for $112 each. Original equipment supplier units are about $8 less.
Tischer BMW runs a web site called getBMWparts.com.
They have fronts
for $99.97 and rears
for $95. I believe these are OEM parts too.
Step 2. Make sure you have all the tools.
Flat blade screwdriver with tip wrapped in tape to remove the trim pieces (or
equivalent)
#2 Philips screw driver
Torx T-20 screwdriver (magnetic tip would be helpful)
Torx T-30 screwdriver
10mm socket
8mm socket 1/4" drive deep well or standard with extension
rags to clean the grease off your hands
Xacto knife to cut the adhesive for the weather barrier (optional)
window cleaner and paper towels (optional)
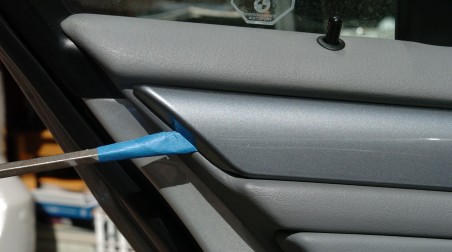
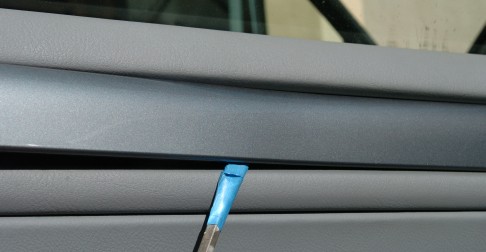
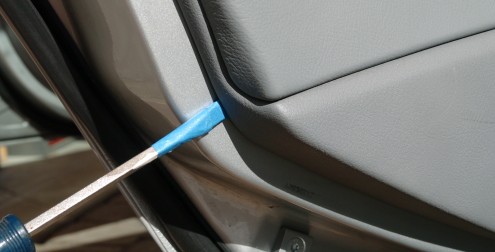
Step 3. Using the flat blade screwdriver with the end
wrapped in tape, gently pry the door trim piece off. There are 4 equally spaced
clips along the length of the trim piece so reposition the screwdriver as you
go.
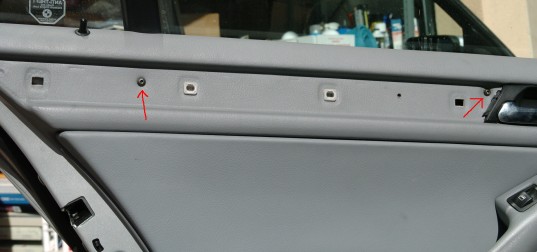
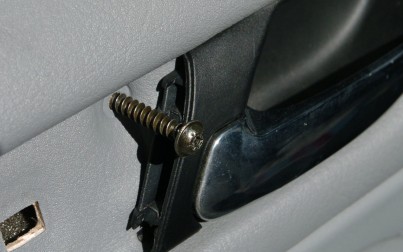
Step 4. Using the Torx T-20 screwdriver remove the two
screws located under the trim piece. The screw near the door handle is a really
long one compared to the others. Remember this during reassembly.
Step 5. Using a flat blade screwdriver, remove the two
caps located below the armrest and then with a Torx T-20 screwdriver remove
the two screws located behind the caps.

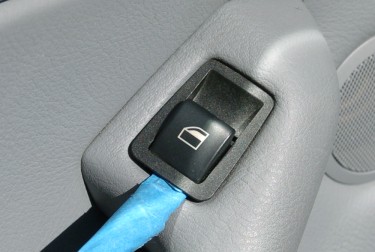
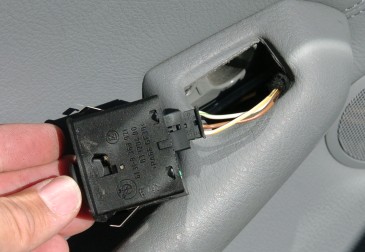
Step 6. Using a flat blade screwdriver, pry out the
window control. Disconnect the wires to the control. Using a Torx T-20 screwdriver
remove the screw located behind the window control.

Step 7. With a flat blade screwdriver pry off the entire
door panel off starting at the bottom and working your way around and up, leaving
the top edge for last. There are 7 clips in total.
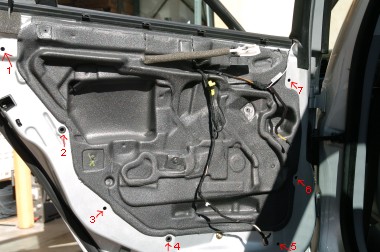
Step 8. The clips that hold the top edge of the door
panel on are different from most other cars. Instead of pulling up, they need
to be pulled straight out. Once the door panel is pulled off its clips there
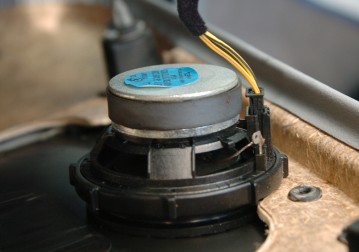
are several cables that need to be disconnected first. Start with the one connected
to the speaker. Next pull the window control cable through and remove the clip
holding the cable harness to the door panel.
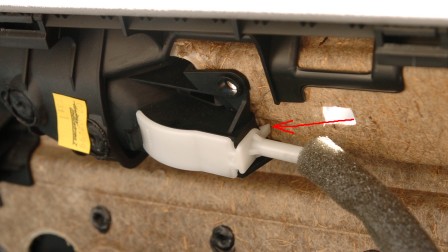
Step 9. Last is the door handle cable. Unhook it by
gently prying up on the locking tab. The cable should easily come off and the
door panel should be free from the door.
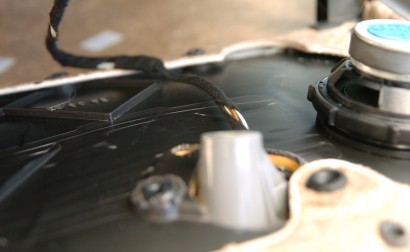
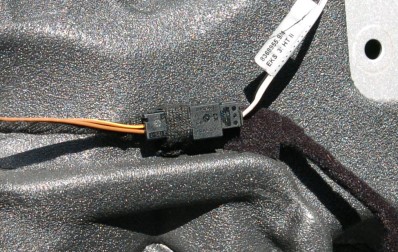
Step 10. Now disconnect the pinch strip wires (white
wires) from the mating connector. Using a flat blade screwdriver pry it off
the door.
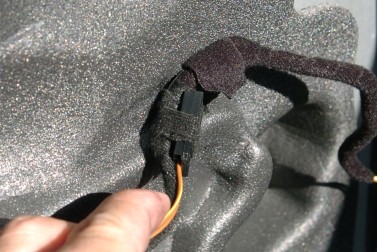
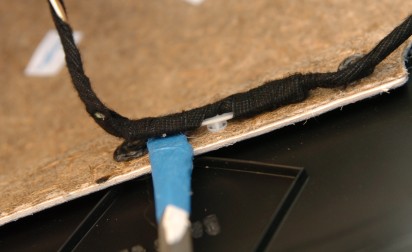
Step 11. Slowly peel the weather barrier from the door
starting at the top and work your way down. Leave the bottom edge attached.
Optional: Use an Xacto knife to cut the black adhesive as you pull. If you don't
cut it, it will form long strings that will stick to everything.
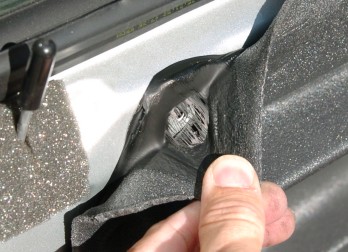

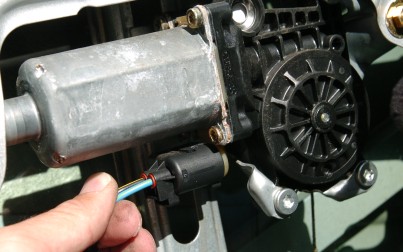
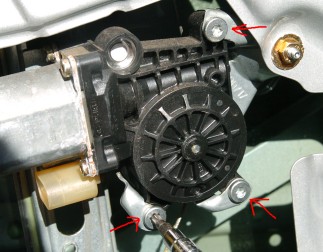
Step 12. Disconnect the wires to the motor. The locking
clip is located on the bottom. Using a Torx T-30 screwdriver remove the three
screws securing the motor. Rotate the motor about 15 degrees and pull it straight
out.

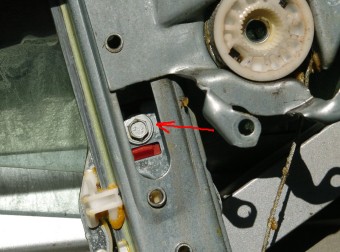
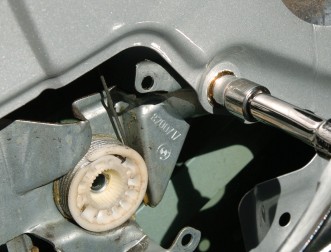
Step 13. Move the window about 1/2 way up so that the
bolt is visible in the hole in the regulator frame. Using the 8mm socket (1/4"
drive) remove the bolt which holds the window glass to the regulator. Using
the flat blade screwdriver gently press on the red locking tab and push the
window glass up.
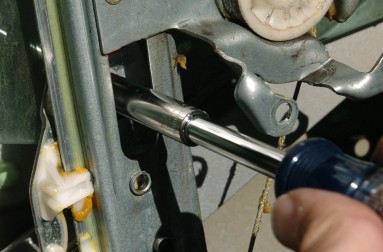
Step 14. Using a 10mm socket, remove the three bolts
holding the regulator to the door.
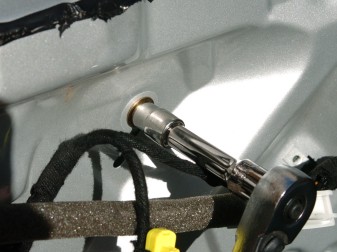
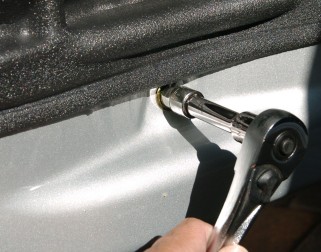
Step 15. Carefully pull the regulator out.

Step 16. Perform Steps 15 through 12 in reverse order. After reinstalling the motor. Reconnect the white pinch strip wires and temporarily connect the window control switch.
Step 17. Test the window operation. Turn the ignition to ON. Using the window control switch raise and lower the window making sure that any loose cables are out of the way. Use window cleaner and paper towels clean the glass making sure to get off any grease. After testing remove the key from the ignition and remove the window control switch.
Step 18 Perform Steps 11 through 1 in reverse order. At Step 9 when reattaching the cable to the door handle make sure that the door handle is in its normal position. At Step 8 make sure the cable to the window control is fed through the hole in the door panel. At Step 7 reattach the door panel by first aligning all the clips with the holes on the door and with your fist hit the door panel back on. At Step 4 make sure the long screw goes in the hole nearest the door handle.
Conclusion. After reattaching everything test the window again.
Roll it up and down several times. If any grease streaks are visible on the
glass clean them off before rolling the window down again.