Front Speaker Upgrade on my E46 10-channel audio system (non-HK)
to Boston Acoustics Pro60SE
The following pictures are from a 1999 323i 4-door (E46) with 10 speaker audio system (not HK)
How to get the door panel off:
Tools required:
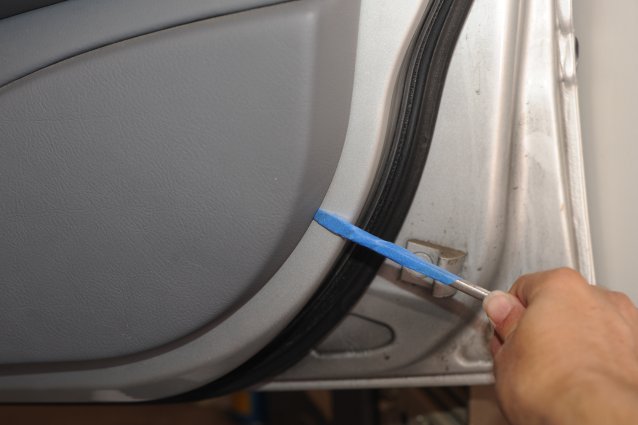
Large flat blade screw driver with tip covered in tape
Torx T-20 Screwdriver
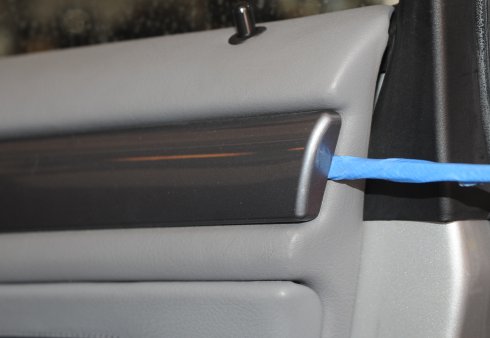
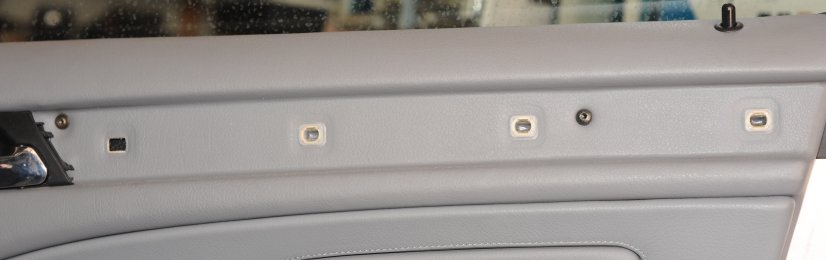
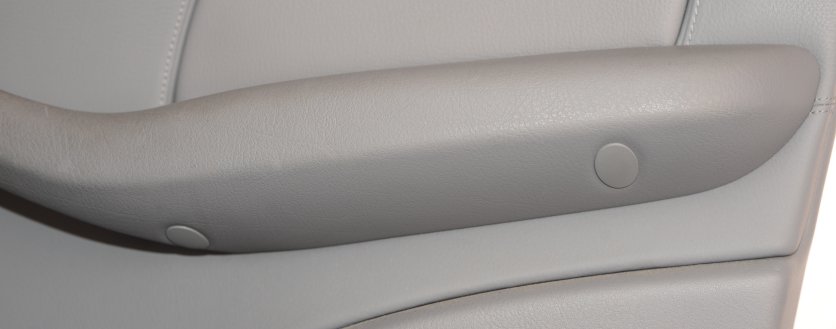
1) Remove the door panel strip by inserting the flat blade screwdriver and gently prying it off. There are four anchor points equally spaced along the length of the panel. They will pop off by just pulling straight out. The remove the two screws using the Torx T-20 screwdriver. The screw near the door handle is a almost 2" long. All the rest of the screws are only about 3/4" long.
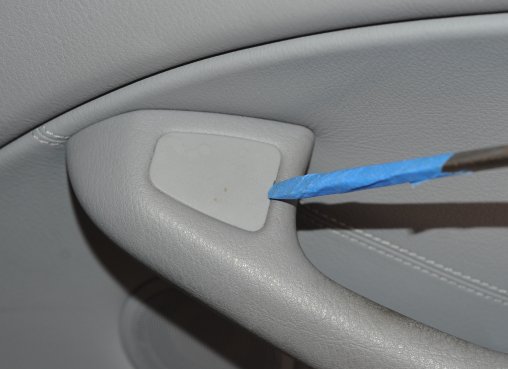
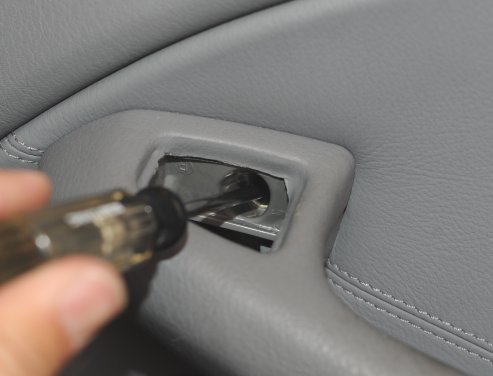
2) Remove the power mirror switch block on the driver's side or the blank panel on the passenger side. Use the flat blade screwdriver. Then remove the screw hidden behind the panel with the Torx T-20 screwdriver.
3) Remove the two screw covers on the lower side of the arm rest. Then remove the two screws with the Torx T-20 screwdriver.
4) Remove the door panel
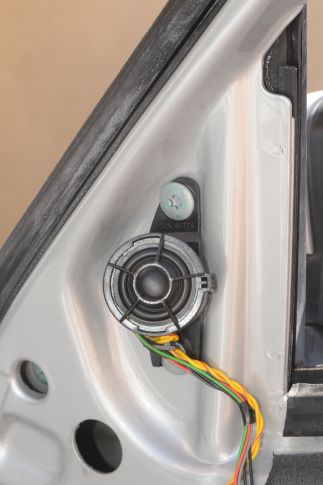
There isn't much room for the back of the speaker since the door is solid. I've seen other people cut the door sheet metal to mount their speaker. This creates other problem, structurally, noise, moisture, plus the volume (air space) in the door is too large for most 5-6" car speakers causing loose bass and greater chance of bottoming out the speaker. For these reasons I didn't want to cut the door.
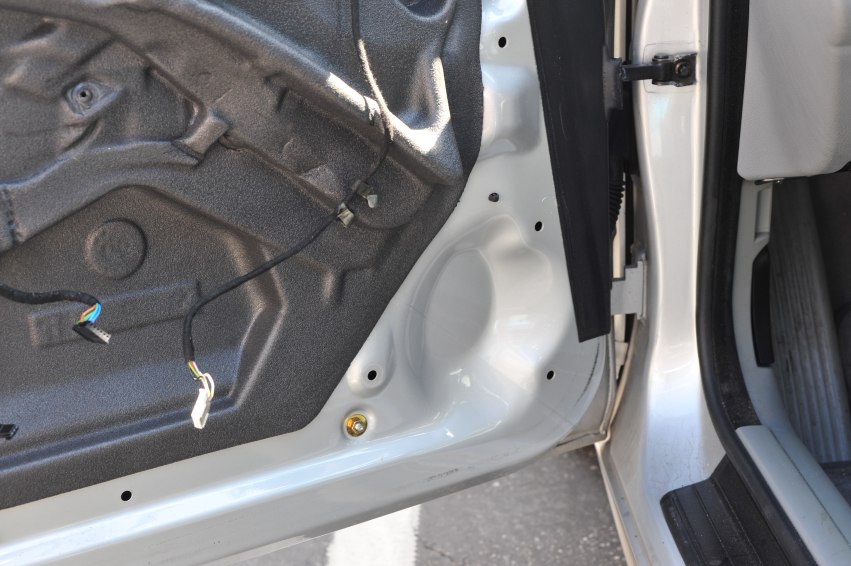
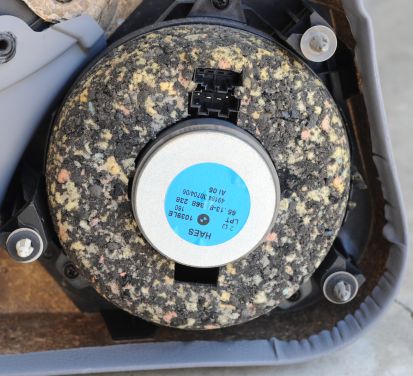
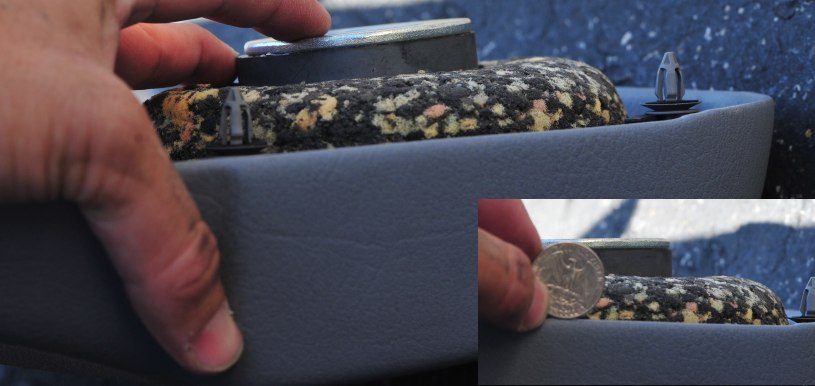
Not much depth. Maybe 1 inch (the diameter of a US quarter is 0.955")
I decided on the Boston Acoustics Pro60SE. They are just a tad too deep, but, with a little modification to the door panel plastic they fit perfectly!
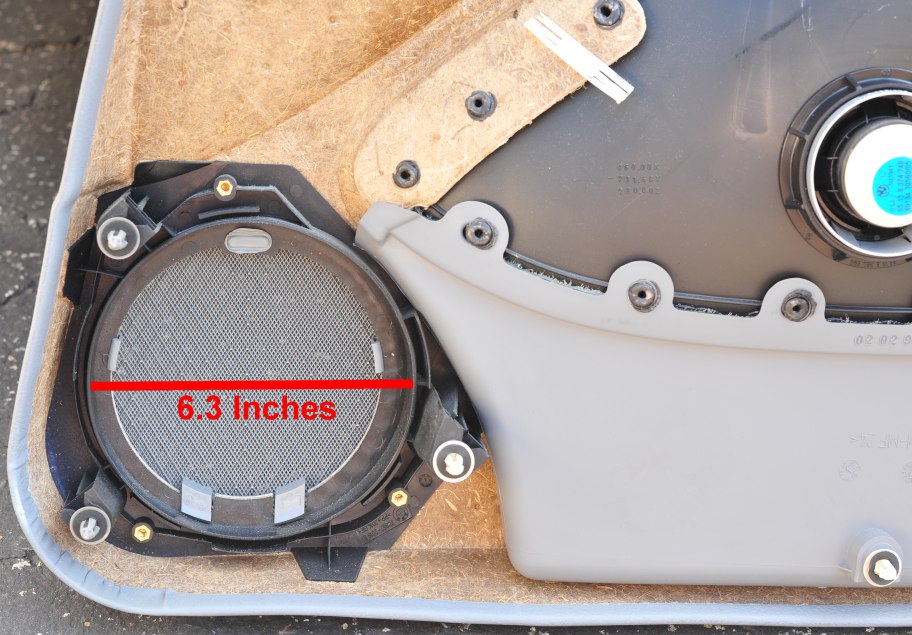
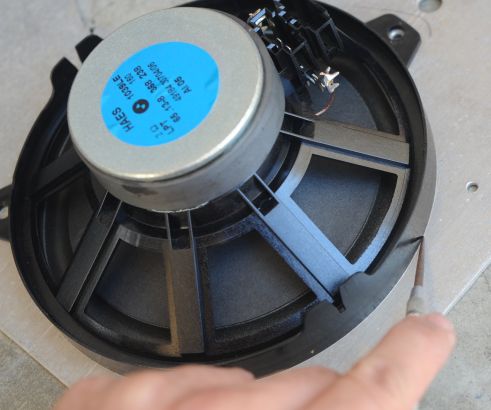
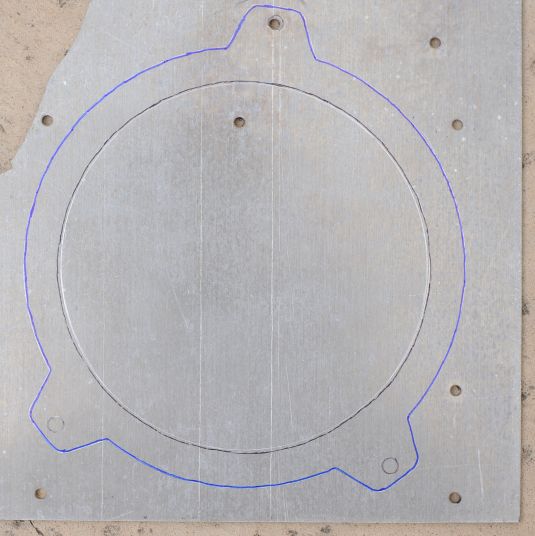
First step is to create an adapter ring to secure them. I took the original BMW speaker traced the outside edge onto a piece of aluminum plate 0.075" thick.
Then I took one of the retaining rings that came with the Pro60SE speakers and traced the inside edge onto the center of the factory speaker outline.
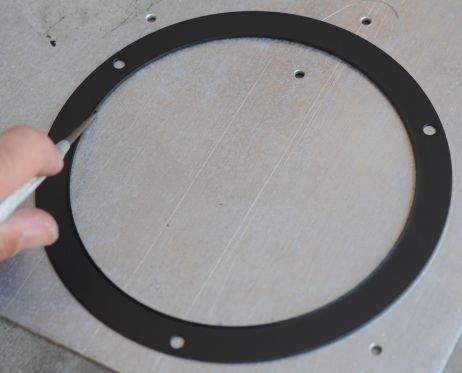
Cut out the retainer with a jig saw. Cut slightly inside of the outer edge and slightly outside of the inner edge. If you don't there will be a bunch of filing required to get everything to fit.
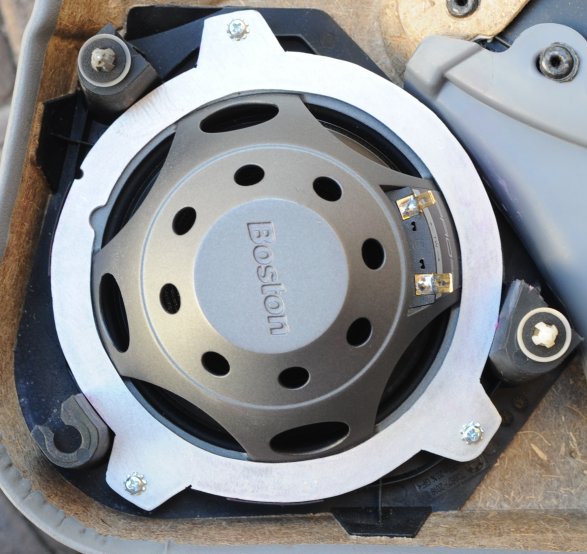
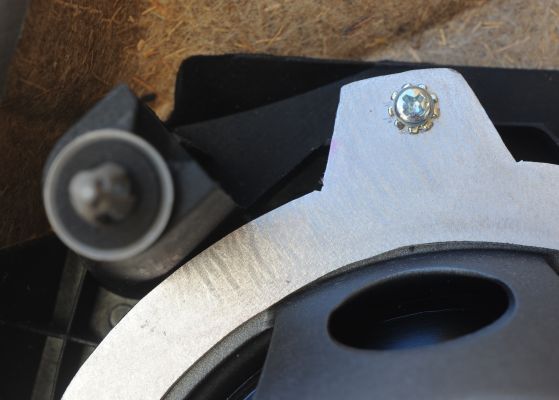
Completed retainer ring holding the Pro60SE's on to the door panel. I replaced the original screws with about 1" screws since the original screws were too short. Use some loctite on the threads to keep them from backing out with all the vibration. Next step, cut off the original connector and crimp on some spade lugs. The wire with the brown stripe is -, the other wire is +. Even though the original speakers were 2 Ohms and the Bostons are 4 Ohms there wasn't as much difference in volume. If the efficiency of the two speakers were the same the Bostons theoretically be 1/4 the power or 6dB down. I think the efficiency of the Bostons are on the high side. I have an Ivie IE-30A 1/3 Octave spectrum analyzer which I'm going to test after I complete the other door. I'm then going to modify the original amp to change the crossover points (eliminating the mid range) and adjust the levels for a flat system. I will post the specs of the factory (non-HK) amp along with component changed needed to equalize the system on my BMW 10-Channel Amp web page.
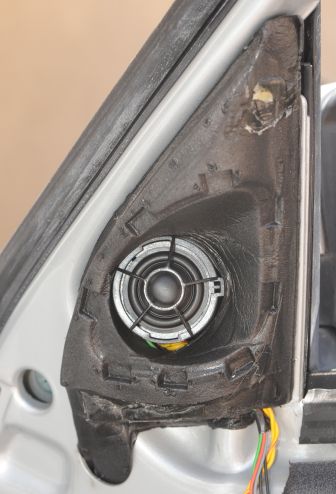
For the tweeter I struggled a lot with where I was going to put it and how I was going to mount it. I decided on the stock tweeter location, instead of where the factory mid-range is. The how to mount it. I started making a really intricate aluminum bracket, but, it wasn't working due to the complex angles to get the position right. After it became obvious it wasn't going to work I started working on another way to mount it. Them I came up with the easiest mounting arrangement position.
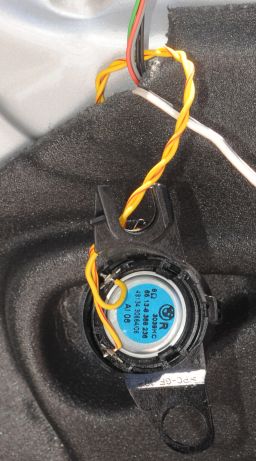
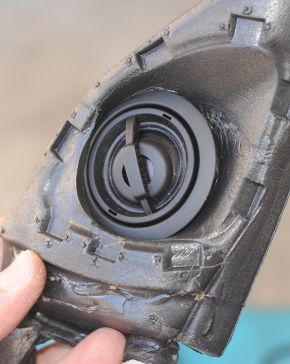
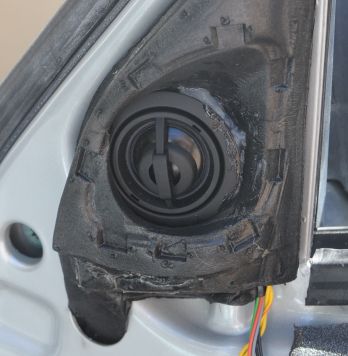
To get at the tweeter peel off the black sheet that starts at the bottom of the door near the woofer and remove the two clips located on the edge of the door near the hinges. Keep peeling it off until about 1/2 way across the top of the door. This will give just enough room to work on the tweeter. Below are pictures with and without the tweeter foam pod. Remove the top screw with a T-30 Torx screwdriver and then put the screw back in. I think it holds the side view mirror on. Unsolder the wires from the back of the tweeter.
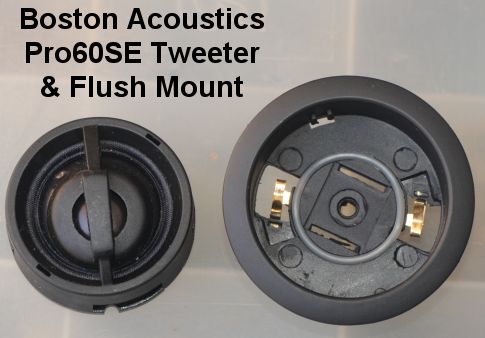
Here is shot of the Boston Pro60SE tweeter and flush mount adapter.
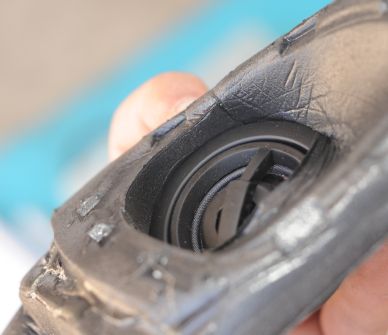
Put the tweeter into the flush mount adapter and secure it. Now take the tweeter
pod foam and kinda wedge the tweeter in through the back. Where the edge of
the flush mount wants to dig into the foam take an xacto and cut the foam to
form a 1/4" deep cut. Push the edge of the tweeter into the cut and push
the rest of the tweeter through. Rotate the tweeter to the desired position
and then put some silicone sealant around the edge to hold it in place. I put
some on both the front and back sides. Solder the wires on (the one with the
red stripe is positive and the one with the brown stripe is negative). Now reassemble.
This is the easiest tweeter mounting I have ever done and it turned out perfect.
Last updated May 21th, 2010
Send comments to scott@bmwgm5.com
Got door lock problems in your BMW E46, E52 or E85. It could be the GM5 module. Find out more at www.BMWGM5.com.