Removing the GM3 module from the E53 X5
Removal procedure for E39 5-series
Removing the GM3 module from the E53 X5 is a little on the difficult side. Normally I tell people to disconnect the battery before removing, but, the battery is located in the trunk under the floor board, under the spare tire and you have to remove the spare tire hold down bracket before you can get to the negative terminal. Instead there are four fuses you can pull instead. To get to the fuse panel, open the glove box and look inside. The fuse panel is located on the top of the glove box. Turn a couple tabs and the fuses will tilt down. Remove fuse #14-5A, #27-20A, #41-5A and #60-30A.
The GM3 module is located behind the glove box and unfortunately you have to remove the glove box to get to it.
1) First remove the plastic panel located below and behind the glove box. There are two clips that need to be turned 90 degrees to release, then the panel can be pulled down.
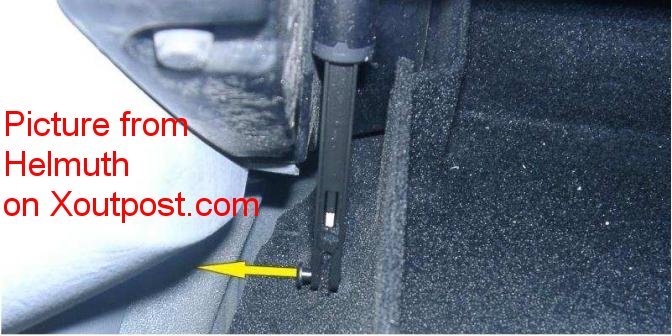
2) To get to couple of the screws you need to open the glove
box beyond it's normal stopping point. To do this locate the damper that keeps
it from opening too far and remove the plastic rivet that attaches the damper
to the door.

3) Now open the glove box beyond it's normal stopping point.
You will have to bend in part of the door to clear the frame.
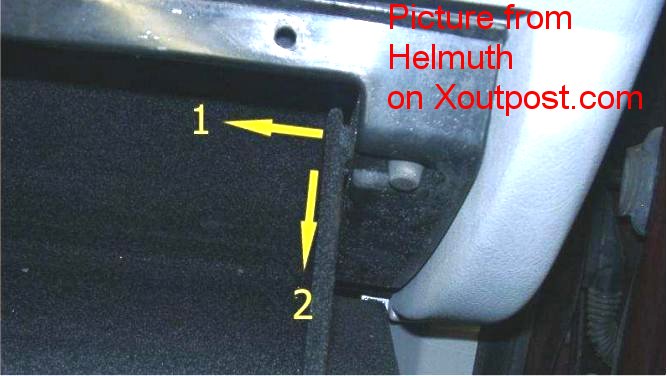
4) Remove the four screws along the top edge of the opening
and then two more screws located on the left and right sides. The last two screws
are not visible unless looking straight up from the floor. Once the 6 screws
are removed the glove box can be dropped by wiggling it out.

5) Once the glove box is out remove the air duct.
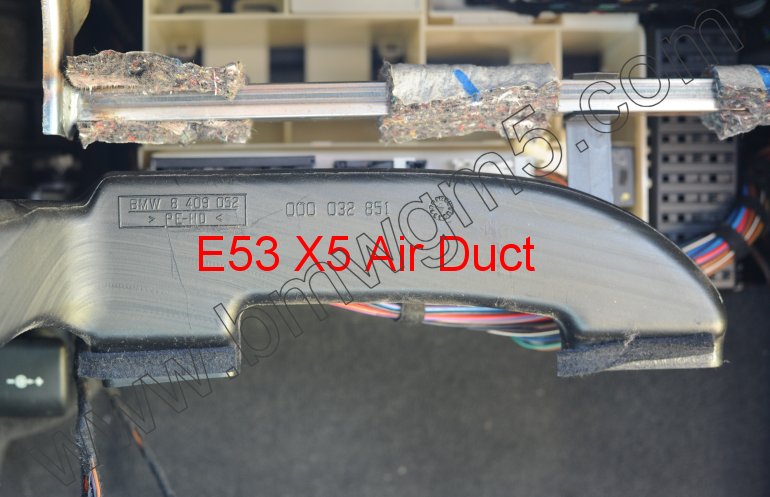
6) Now that you can see the GM3 module, pull it straight out.
You may need to reach your hand around to the back by Clip 2 and push it out
from behind while moving Clip 1 and Clip 2 out of the way.
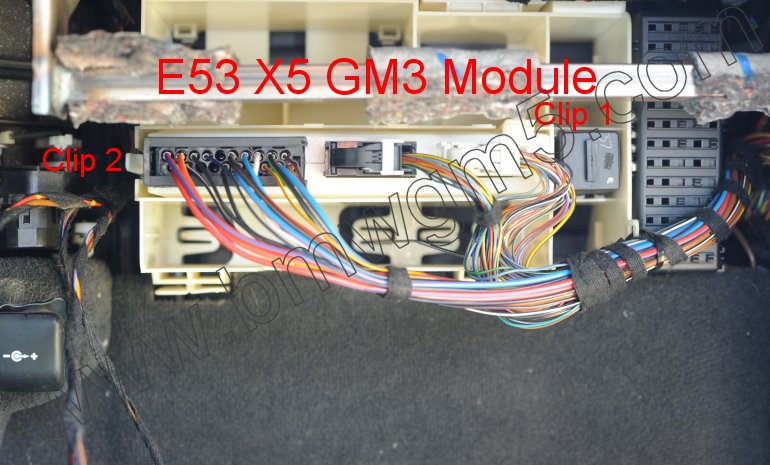
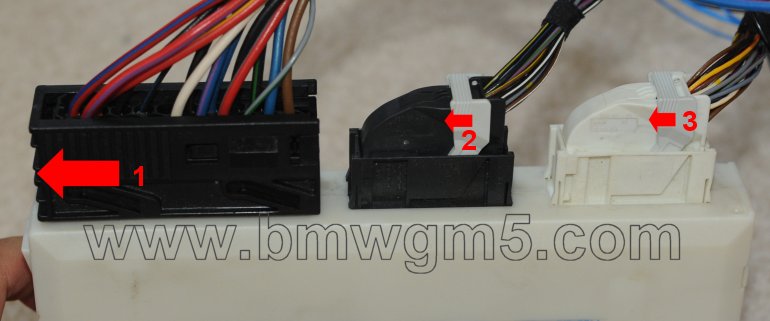
7) Once the module is slid out undo the connectors. The large
connector, #1, has a sliding locking mechanism. At first this one slides easy
then it gets really rough. You may want to insert large screwdriver and help
it that last 1/2 inch. The other two connectors, #2 and #3, have a latch that
needs to be rotated out of the way. There is a small locking tab at the top
that needs to be pressed down before the latch will move.
There is a good glove box removal procedure in this forum thread starting with post #8 www.xoutpost.com thread 3089 Some of the picture above are stolen from that forum thread.