Common problems when replacing the relays
September 13, 2013
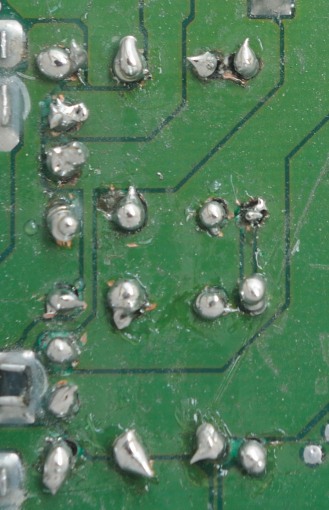
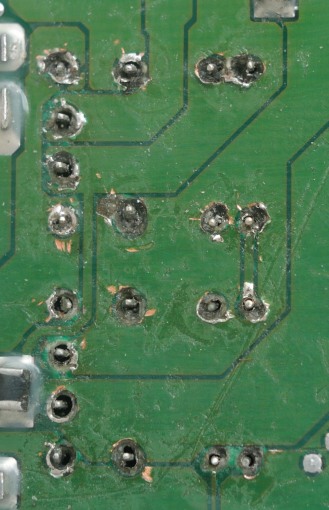
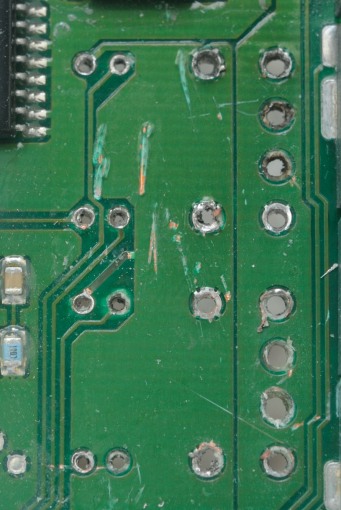
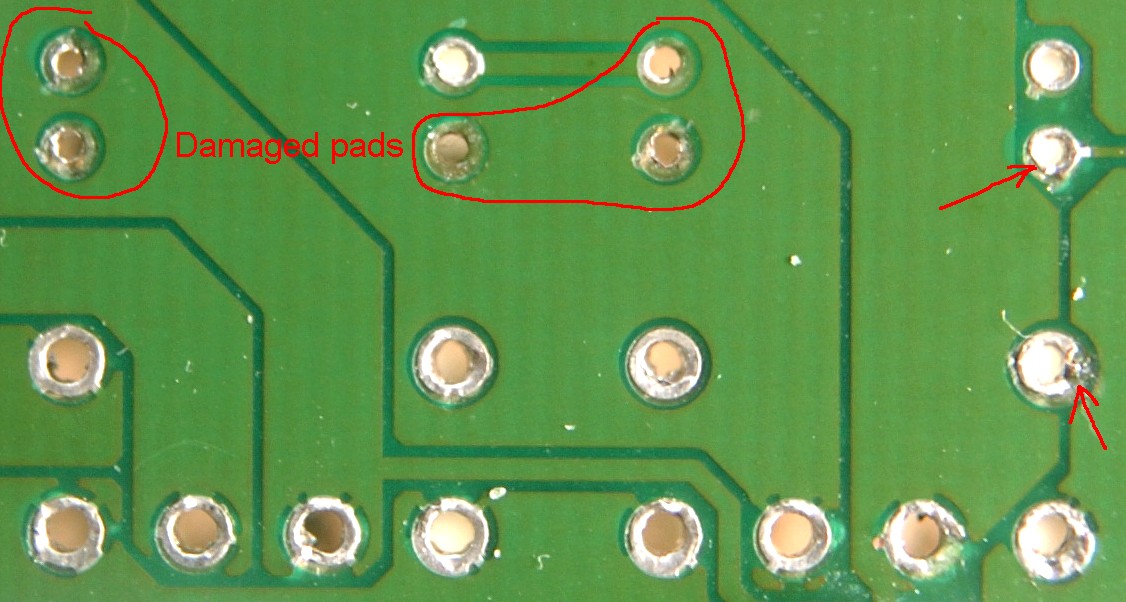
Just got a new worst module ever! This one was soooooo bad it's not even funny. The left picture is what it looked like when it arrived. The center picture is after I removed all the solder. The right picture is the other side of the board after the relays were removed. After removing the solder I noticed that all the solder pads were gone or badly badly damaged. After removing the relays it was apparent that the problem was much much worse. All the plated through holes had been ripped out of the board. Plated through holes are basically copper covering the inside walls of the hole in the board. It connects the circuitry on the top side of the board with the circuitry on the bottom. Without this the relay will not make connection to the circuitry on the top of the board. Since both the plated through holes AND the solder pads were gone there is nothing to solder to to secure the relays in place or make the required electrical connection. Wires would need to be added to replace the connections that were destroyed. So on this board every single relay pin, 20 in all, needed one or more jumper wires added. Needless to say it was very time consuming and tedious. In the end the problem ended up being one of the channels of the BA2003 relay driver was bad and the relays didn't even need to be replaced.
 .
. .
.
Lately I've had customers who purchased relays come back to say that they didn't fix the problem or that now the problem is different. My immediate response is you dorked up the board! I'll fix it, but, it's going to cost more than if you had sent it to me in the first place. Here is one of those boards. He said he could solder, but, obviously it looks like crap. A combination of improper soldering iron, wrong tools for removing the solder and inexperience working on this type of board.
Getting the relays out is not easy. Don't believe me. Here
are some posts from people that say the same thing.
Post #1 -> http://www.bimmerfest.com/forums/showthread.php?t=609792
Read post #8, 10 & 11 -> http://forum.e46fanatics.com/showthread.php?t=825919
Read post #22 & 28-> http://www.bimmerfest.com/forums/showthread.php?t=226467
Post #267, 271 -> http://forum.e46fanatics.com/showthread.php?t=113239&page=14
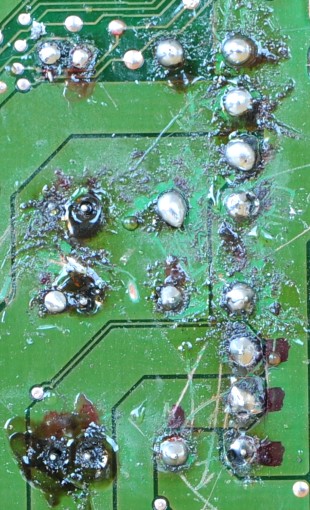
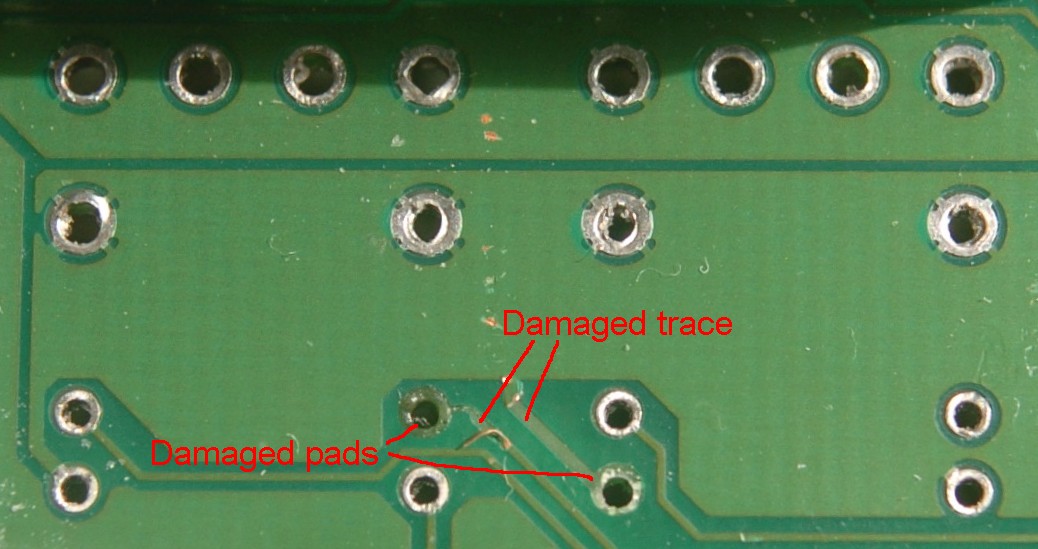
Here is another dorked up board after I took the relays off and cleaned it up. First thing I noticed was 5 of the component pads had been damaged and where now missing from the back of the board.
While the missing pads looked bad it was not the cause of the problems he was experiencing. I removed the relays to get a look underneath and that is where I found two of the problems. See picture below. He has ripped up two traces, two more pads and you can't see it in the picture, but, he also ripped out some of the plated through holes (plated through holes are copper bonded to the walls of the holes which connect the pad on the top with the pad on the bottom).
When I work on these modules I use a Metcal soldering iron that can put out up to 80 Watts of heat and a High Vacuum Desoldering Pump. Even with this equipment it still takes me some time to get each relay out. After that I inspect the holes & traces with a microscope, soldering in the new relays, cleaning off the flux, inspection under a microscope again and then apply conformal coat.
The other day while working on a customer's GM5 module I pulled
out a plated through hole while removing the relays. Good think I caught it
because if I hadn't, the module would not have worked correctly when I put
in the new relays. The hole I damaged happened to be a critical one. I caught
the problem and had to add a wire to jumper around the broken connection.
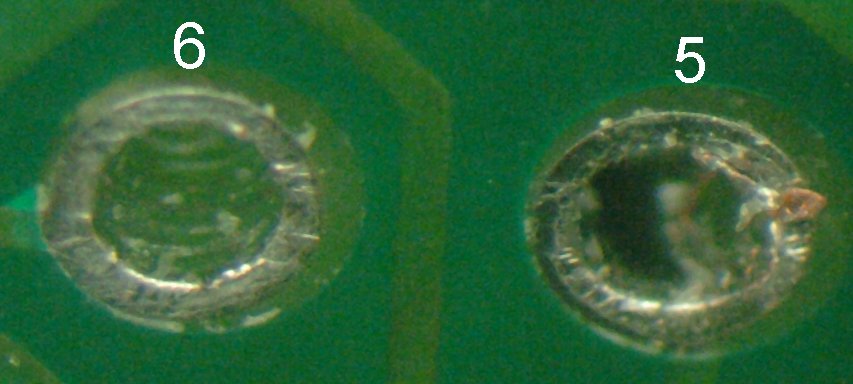
I took some pictures of the board. See if you can identify the hole that I
ripped the plating out of.
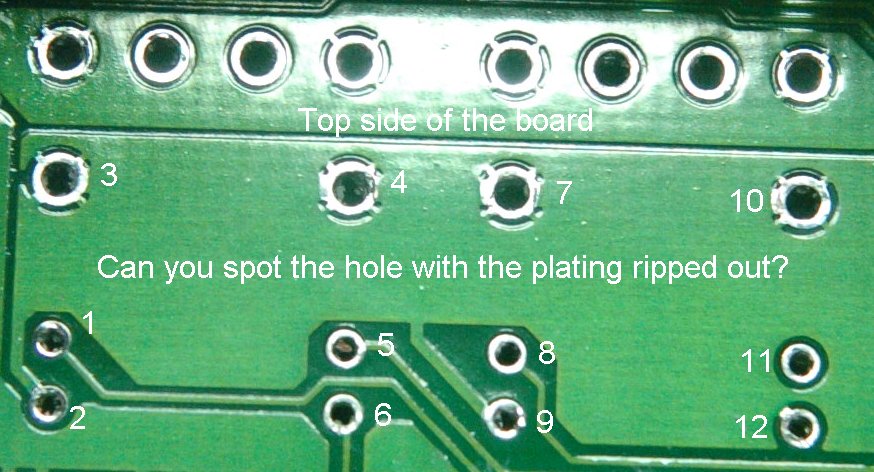
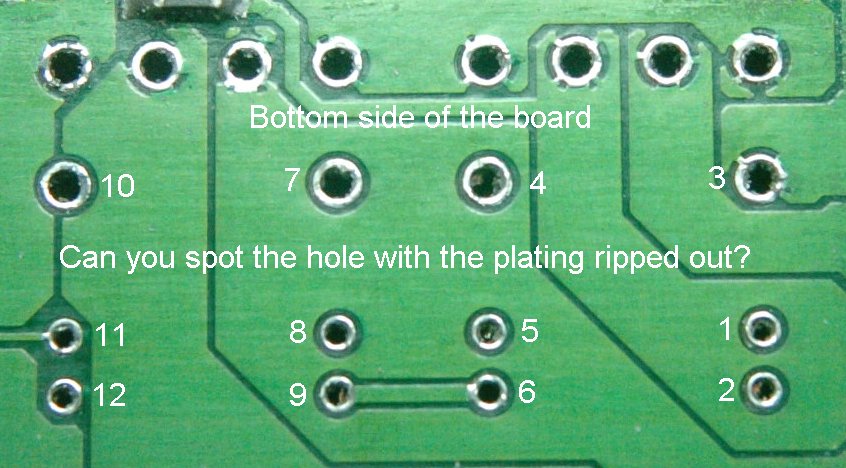
The answer is hole #6. Hard to tell isn't it? In fact I can't tell unless I look at it with a microscope. Below is what it looks like through my 20x microscope. Hole number 5 has a little bit a damage, but, most of the plating is intact. You can see the copper plating is ripped up on the right side and you can see a little bit of light green between the two copper colored areas. Now look at hole 6. It has nothing but that light green color. That is a total lack of plating. Without this plating the top pad & trace and the bottom pad & trace are isolated from each other. Trying to fill the hole with solder usually doesn't work and if it did, is not considered a reliable connection. The only option is to add a wire to the board to rejoin the broken connections. It can be tricky finding where the trace goes and getting a good place to solder on a wire.
Want to know how to make sure this doesn't happen? When pulling the solder out of the hole make sure that the pin wiggles freely in the hole and is not still attached to the sides. Pulling the relay out while it's still attached is the easiest way to pull out plated through holes, rip up pads or traces and permanently damage the board. After removing a relay inspect the relay leads for signs of copper plating. This is how I discovered that I pulled out a plated through hole. See picture below. The pin from hole 5 has a small piece of copper on the left side. The pin from hole 6 has a complete piece of plating still attached. The pin from hole 4 is clean.
Doing the job right is not that difficult with the right tools. Your chances of success drop rapidly without them or if you are impatient. Get a good solder sucker if you don't have one and get a decent soldering iron if you don't have one. Take your time. Do not pry the relay out of the board, unless your board has the red conformal coat then you may need to do a little trying as the conformal coat partially glues the relays to the board. Make sure you can wiggle all the pins freely before trying to pull the relay out. If it's done right, the relay should practically fall out of the board. You should only need to pull the relays out if they are stuck due to conformal coat at the base of the relay.
If you don't feel confident doing it yourself then please find a professional to do it for you or send it to me for repair. Here is the current GM5 repair price list. If you already bought the relays from me and changed your mind about doing it yourself then deduct $25, just ship the unused relays back with your module. If you already attempted to remove the relays, but, couldn't get them out and decided to stop then add $40. If you got the old relays out, damaged the board, the problems are worse than before then add $100.
FAQ Section
I have the relays, but, don't feel confident doing it myself. Can I send it in for repair? Sure, no problem. As long as you haven't attempted to remove the relays then ship them back with the module. Find the normal repair cost listed here GM5 repair price list and deduce $25 if sending back unused relays.
I think I messed up the board doing it myself. Can you fix it for me? If you replaced the relays yourself or attempted to and feel that the board might be messed up because the module has even more problems or the problems are just different. I'll still work on it, but, troubleshooting is very time consuming and cost is $100 more than the normal repair price listed here GM5 repair price list. For this job type of job modules usually ship out the next business day. With this type of service I do a detailed check of all the traces, pads and plated through holes which take time. I want to do it right so you don't have any more problems.
I want it repaired and sent back ASAP! Here is the current GM5 repair price list.
I don't reside in the US, can you still repair my module? International is not a problem. I do it all the time. Current international repair pricing is here GM5 repair price list.
Can I drive the car while the GM5 is out of the car? Yes, you can drive the car without the module. A few things won't work, obviously, like windshield wipers, interior lights, alarm functions, remote lock/unlock, power windows (make sure the windows are in a position you can live with before removing the module), remote trunk release, headlight washers and a few other minor items.