BMW General Module 5 Removal Procedure for E46
3-Series Vehicles
Instructions for removing from a Z4 are located here
Tools required:
#2 Philips screwdriver (magnetized tip)
10mm nut driver (socket with straight handle)
wire cutters
Step 1. Disconnect the battery. The battery is located in the
back right side of the trunk, under the plastic tray. When disconnecting the
battery always disconnect the negative terminal. You need only disconnect one
side.
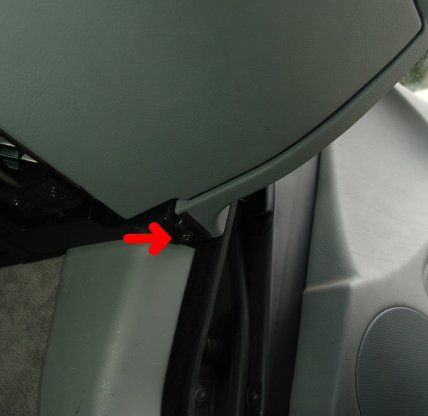
Step 2. Remove the screw just below the glove box on the right
side. See picture.
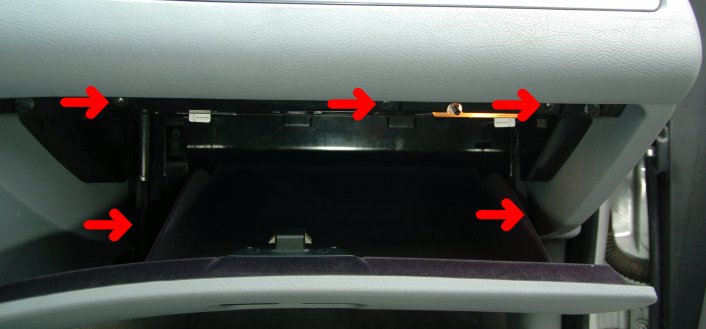
Step 3. Open glove box and remove the 5 screws. See picture. On the X3 there are two more screws at the very back of the glove box (not shown).
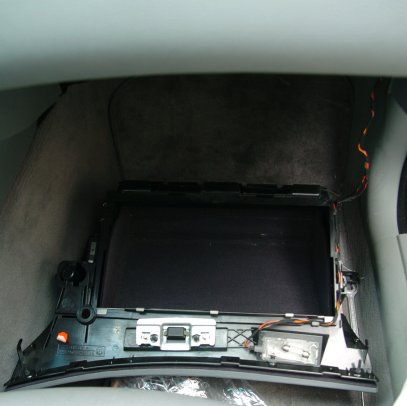
Step 4. Pull the glove box straight forward until it is free
of the dash and rest it on the floor. This may take a bit of wiggling as the
top front edge always seems to get caught. There are two cables attached so
just place it on the floor mat.
Step 5. This step and the next one are optional, but, help make
room for the subsequent steps. Disconnect the glove box light by squeezing the
locking clip and pulling the connector out.
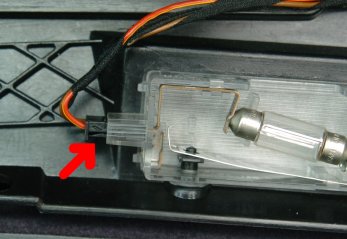
Step 6. Disconnect the cable to the flashlight charging socket.
Free the cables from the glove box and move the glove box away to make room.
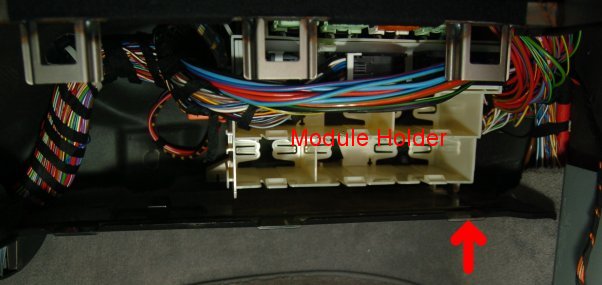
Step 7. Pull the right side of the black plastic panel forward
to unhook it from the white module holder and bend it downwards. This panel
is tricky to put back so I usually leave it hanging there.
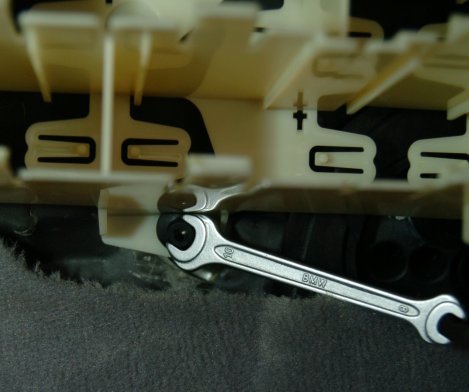
Step 8. Remove the 10mm plastic nut securing the white module
holder at the bottom. A 10mm nut driver works much better than the open end
wrench shown, especially for reassembly.
Step 9. At the top of the module holder, cut the cable tie holding
the bundles of wires.
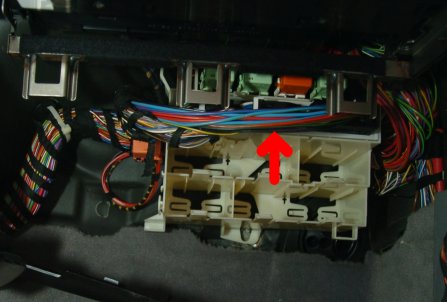
Step 10. Those bundles of wires connect to the GM5 module located at the top of the module holder. Unfortunately there are two metal brackets in the way of getting the GM5 module out. The module holder must be removed from its mounting and moved down out of the way of the brackets. There are two clips holding the module holder at the top front left and top front right. These clips are very difficult to see due to the wire harnesses being in the way. You need to determine which way the clips are installed because I've seen some cars where the clips release by pulling on the module holder and some cars where the clips release by pushing on the module holder. I've even ran across a car that had the left and right clips installed differently. If you can't see the clip try using your finger to feel.
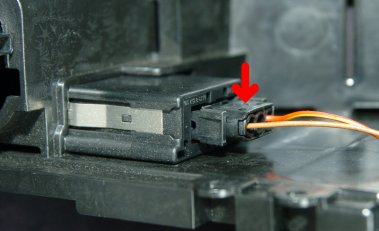
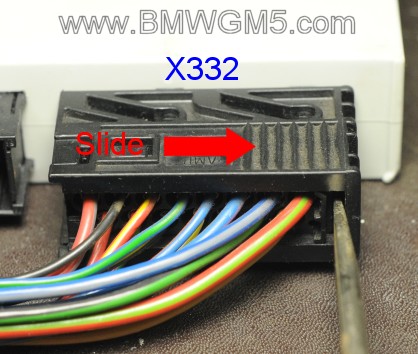
Step 11. Disconnect the 3 connectors. Start by disconnecting
the connector on the far right. This connector has an outer sleeve that slides
to the right. You might need to insert a flat blade screwdriver just to the
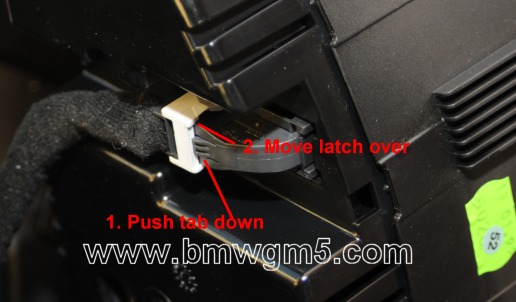
right of the wires to get it started. See picture below left. The next two connectors
have a white latch lever that needs to be rotated 90 degrees. See picture below
right.
Step 12. Once the module holder is free bend the front down so that the GM5 module can be slid forward under the two metal brackets. There are two plastic catches that need to be pushed out of the way slightly to allow the module to slide out.
Reinstallation
Step 1. Preform steps 1 through 12 above in reverse order. You can skip steps 9, you don't need to install a new cable tie.
Now that you got the module out send it to someone who knows what they're doing. GM5 Repair Service
Notes: When the GM5 module is reinstalled after repair it is good to go. There is no need to go to the dealer for recoding or programming or anything like that. It should just work. When testing the door locks make sure that the driver's door is closed. I have gotten many calls where the customer says that the door locks don't lock now. I tell them to shut the driver's door and that solves the problem. The module will not let you lock the doors if the driver's door is open. The passenger doors can be open, but, not the driver's.
Some people have said they broke the connector locking clip
and asked if I had replacement parts. I do not, but, I found some part numbers.
61136913644 is the connector housing for the 26 pin dual row connector. It's
$15.90 from ECS Tuning. Don't worry that the color is different. This is the
generic housing.
61136920074 is the connector housing for the 54 pin triple row connector. It's $13.46 from ECS Tuning. Again this is a generic, uncoded housing that is not black like the original.
61130005197 is the contact with small diameter wire used in the above housing.
$1.63
61130006663 is the contact with large diameter wire used in the above housing.
$1.77
61131382566 is the housing for the large slide latch connector. It's $6.59 from ECS Tuning.
61138377072 is the connector housing, 3 position female. $14.59 for a 10 pack
For contacts use the same as those listed above.